How to add your signature to your photograph
It is easy to add your signature to your photographs, making them look professional and preventing copyright infringement. Below you will find simple step-by-step instructions. You can use any number of photo enhancing programs like Photoshop and GIMP, the latter of which we used since it is a free and open-source raster graphics editor program. *
Go to https://www.gimp.org to download the free program.
* GNU Image Manipulation Program (GIMP) is a cross-platform image editor. GIMP is a free and open-source raster graphics editor used for image retouching and editing, free-form drawing, converting between different image formats, and more specialized tasks.
![]()
After you have loaded GIMP onto your computer, you may want play around with the program to acclimate yourself with the various aspects of it. It is a very simple to use program, but you should familiarize yourself with the toolboxes and menus.
To start:
1. Create your signature by practicing on an 8 1/2” x 11” piece of paper as shown above.
2. When you have decided that your signature looks good, select your favorite signature as shown in the below:
![]()
3. If you have a scanner, scan the entire page and save it as a jpg. If you do not have a scanner, you can take a photo of it using your camera or phone.
4. Open the file of your signature using GIMP.
5. Either use the eraser in the toolbox to eliminate the unwanted signatures, or use the crop tool to save the signature that you like:

6. Save the file as a png by using this format:

7. Next, apply some professional text below your signature. You can add any text you like and the font in GIMP such as “Photography” or any other wording you like using the text tool (the big A in the toolbox):

8. Export (save) as a different png file, in case you want add different wording later to the original signature png file.
9. Crop to about the size above and save as the same file in number 8 above. Close the file.
10. Select the photograph that you want to add your signature to and open it in GIMP:

11. After you open the photo, then it is time to add your signature.
12. In the GIMP file menu click on “Open as Layers” and select the file that contains your signature.

13. In the toolbox, use the scale button, shown below, to resize the signature to what size you like:

14. Your screen should look like this:

15. Move your signature to any location that you like on your photo using the move tool:


16. Next, in the menu select “Layer” then “Transparency” then “Color to Alpha”. If your signature contrasts with the background color of the photo, you may want to change the default signature color from black to white (or vice versa) by selecting “Color” then “Invert”.
17. To change color of your signature:
– select the “Colors” tab
– select “Colorize the image”
– slide the lightness bar almost all the way to the right
– slide the saturation bar to desired color
– slide the hue bar to desired color

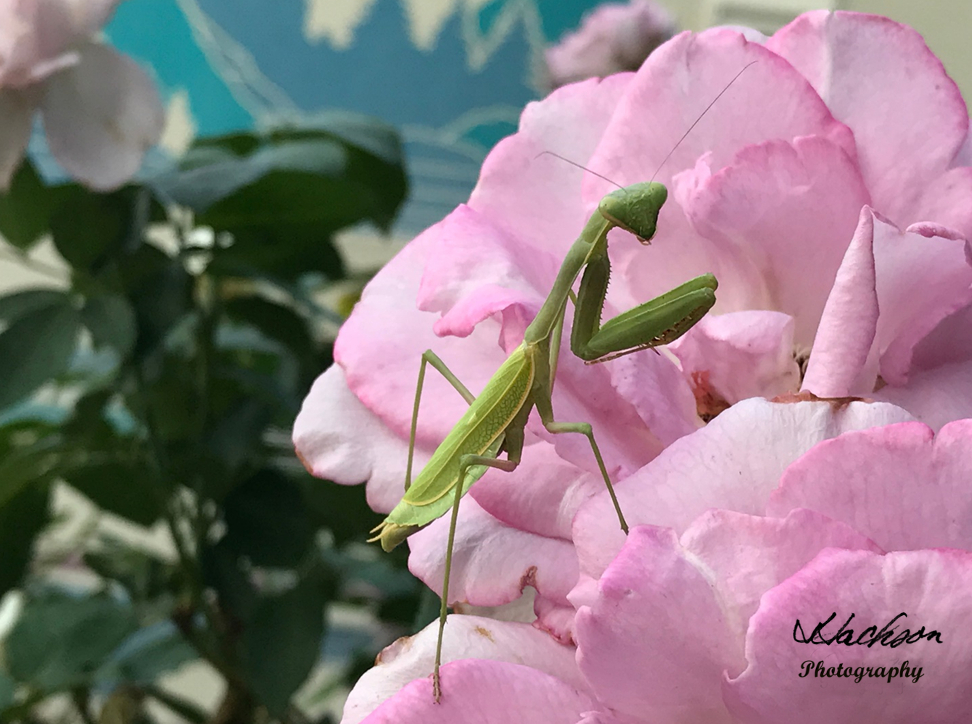
Above, photo showing signature with the color changed from black to gold
18. Export (save) your finished photo, it is recommended that you use a different file name in order to retain the original photo file name for later updating, image enhancement, etc.
19. It is also recommended that you save any file that you plan to attach or post on emails, texts, or social media site that you reduce the photo files size to about 72-95 dpi, and make the size about 20” wide.
20. As with most computer programs, practice makes perfect. We hope that this set of instructions will help you along the way to mastering the art of adding your professional signature to your photographs.
All photographs are the copyright of Jim Jackson Photography. Please contact me for authorization to use or for signed, high-resolution copies.
Disclaimer: This is not an endorsement for GIMP, wait, I take that back, it is in fact a ringing endorsement for the wonderful, powerful and free GIMP program. I have used Photoshop and Lightroom for many years and find that their subscription costs are simply not worth what I can get for free using the GIMP program.